

The main material - sometimes we buy meat packed it this material. It's light and easy to cut (along the longer side).

I made a simple shapes house, one door and two small windows. It's not to be open, just to lay on the top of the table.

I made all the stone patern. Such a small amount of surface and I still got bored.... Imagine a castle wall!


In the junctions of the walls you can see what happens when you have to cut across.
I painted the space between the stones black, then grey, then another black wash and some highlights on some stones.
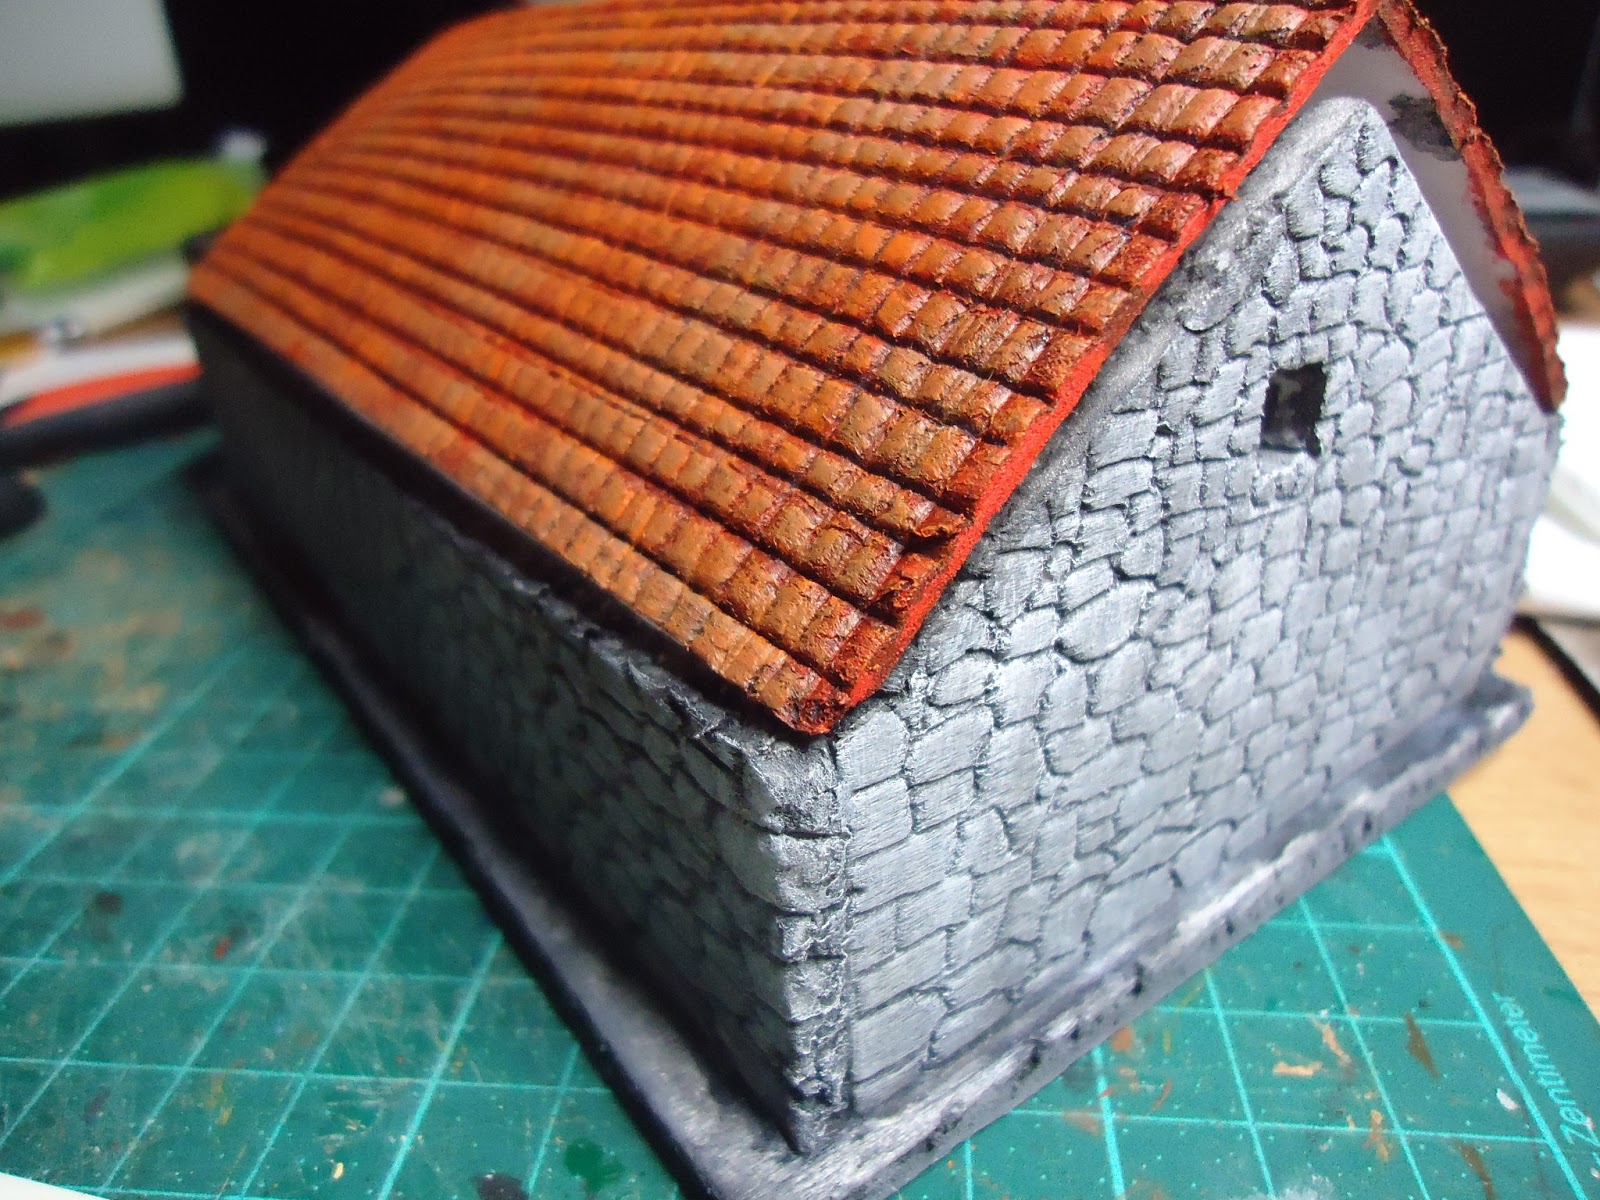


The roof is made of K-Line but I guess I could have done it with the same material as the walls. Again, black, then red, orange next and black wash to finish. And some brown here and there...
See the space between the two sides?!

The solution was miliput...


Size? 16x10 cm - It's meant to be used with 1:72 stuff.


The final result. Simple, light, easily breakable...


That really Looks good. One way I found to stabilise the foam sheeting is to glue some cardboard Sheets to the back. Gives it a bit more weight as well.
ResponderEliminarThat's good work, I agree with Paul about the cardboard.
ResponderEliminarTop work David!!! and a good idea about the card from Paul.
ResponderEliminarVery good work David !!
ResponderEliminarI agree with Paul ! that's what I will do!
Thanks, gentlemen! I will do that next time. (soon, I want to build a small church!)
ResponderEliminarWow! That is amazing - what a transformation - and what basic material you started with. Fantastic as always. Best, Dean
ResponderEliminarGreat tutorial! Thanks for sharing David!
ResponderEliminarGreetings
Peter
http://www.peterscave.blogspot.be
great stuff! and thanks for the tips.
ResponderEliminar